Windows Active Directory Logs
NXLog Installation
Download
Download the installation package from the NXLog website, or a copy from our AWS repository:
NXLog site: http://nxlog.co/products/nxlog-community-edition/download
AWS repo: https://s3.amazonaws.com/SecurityDo/public/nxlog-ce-2.10.2150.msi
Installation
Open the installer and following the on-screen instructions to install NXLog.
After installation, a README for NXLog should appear. (It is also copied below.)
README

Please edit the configuration file after installation. This should be located under C:\Program Files\nxlog\conf\nxlog.conf or C:\Program Files (x86)\nxlog\conf\nxlog.conf depending on your windows architecture. You might need to adjust the ROOT folder in the config file, otherwise
nxlog will not start. After this is done, you should be able to start the nxlog service from the service manager. Alternatively, the service can be also started by executing C:\Program Files (x86)\nxlog\nxlog.exe. Running the executable with the -f command line argument will run it in foreground if you don't want to run it as a service.

nxlog will write its own messages to the logfile located under C:\Program Files (x86)\nxlog\data\nxlog.log

If you have trouble starting or running it, please take a look there.

See the NXLOG Reference Manual for details about configuration and usage. The manual should be available online at http://nxlog.org/resources and is also installed under C:\Program Files (x86)\nxlog\doc\
Note: We can provide several .conf files (dependent on Windows Server OS version) already configured for the deployed Fluency instance. Additional editing should not be needed. It will replace the original .conf file from the installation.
The provided nxlog.conf file should be placed under:
C:\Program Files (x86)\nxlog\conf\nxlog.conf
NXLog can be started from the Services Configuration Window
Under Start Menu, choose "Administrative Tools", then select "Services" to open the Services Configuration Window:
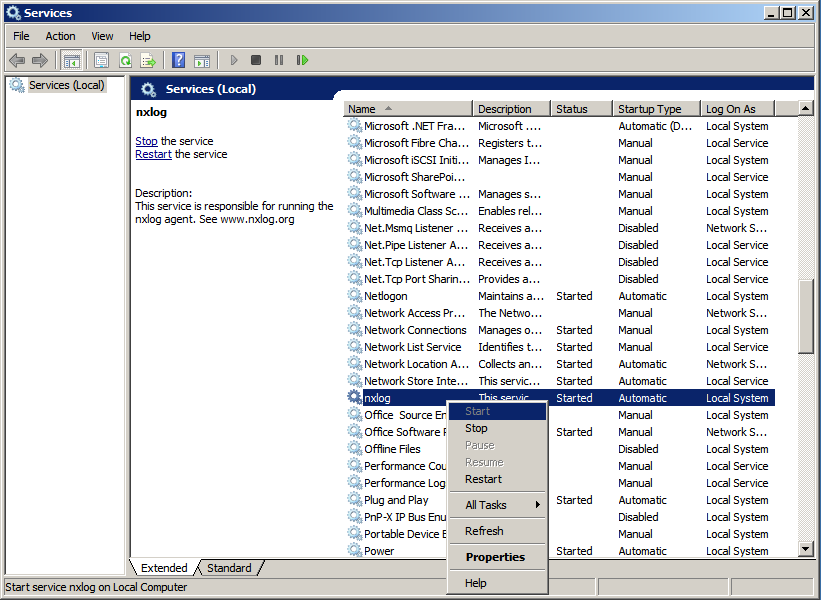
Find and right-click the “nxlog” item, and choose the desired operation (Start/Stop/Restart).
Windows DHCP Server (skip if DHCP role is not enabled):
Enable DHCP audit logging
Under Start Menu, choose "Administrative Tools", then select "DHCP" to open the DHCP Configuration Window:
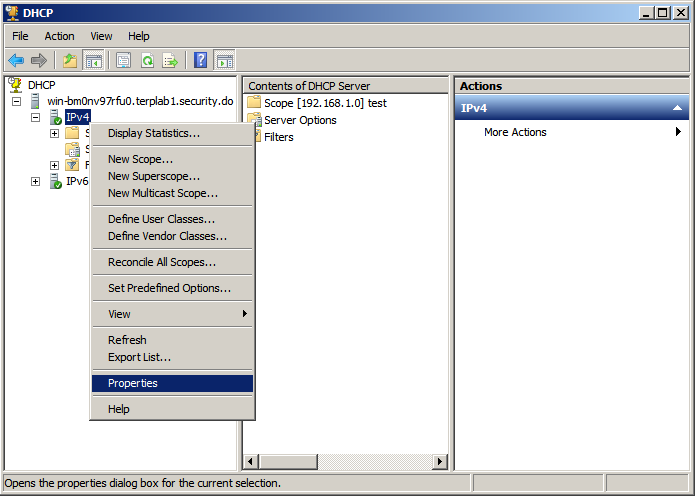
Under IPv4 (right-click), select Properties:
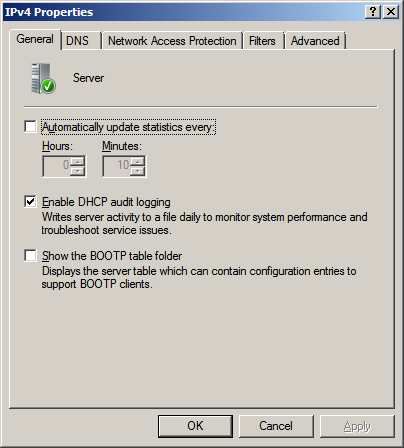
Verify that the “Enable DHCP audit logging” option is enabled. Click "OK" to confirm/exit.
Appendix A: nxlog.conf sample
#
# Configuration for sending Windows (AD Server) logs to Fluency Cloud
#
# Version: 2.0.1
# Last update: 2021-11-17
#

define FLUENCY_DESTINATION_ADDRESS 192.168.1.130
define FLUENCY_DESTINATION_PORT 514
define FLUENCY_OUTPUT_MODE om_udp

## Please set the ROOT to the folder your nxlog was installed into,
## otherwise it will not start.

# For 32-bit systems use the following:
#define ROOT C:\Program Files\nxlog
define ROOT C:\Program Files (x86)\nxlog

Moduledir %ROOT%\modules
CacheDir %ROOT%\data
Pidfile %ROOT%\data\nxlog.pid
SpoolDir %ROOT%\data
LogFile %ROOT%\data\nxlog.log

<Extension json>
    Module      xm_json
</Extension>

<Extension syslog>
    Module      xm_syslog
</Extension>

<Input internal>
    Module      im_internal
</Input>

<Input eventlog>
    Module      im_msvistalog
    Query       <QueryList>\
                    <Query Id="0">\
                        <Select Path="Application">*</Select>\
                        <Select Path="System">*</Select>\
                        <Select Path="Security">*</Select>\
                    </Query>\
                </QueryList>
    Exec if ($EventID == 5156) OR ($EventID == 5158) drop();
</Input>

<Input dhcp_in>
    Module  im_file
# For 32-bit systems use the following:
#   File    "C:\\Windows\\System32\\dhcp\\DhcpSrvLog-*.log"
    File    "C:\\Windows\\Sysnative\\dhcp\\DhcpSrvLog-*.log"
    SavePos True
    InputType LineBased
    Exec $Message = $raw_event;
</Input>

<Output fluency_out>
    Module      %FLUENCY_OUTPUT_MODE%
    Host        %FLUENCY_DESTINATION_ADDRESS%
    Port        %FLUENCY_DESTINATION_PORT%
    Exec        $raw_event = replace($raw_event,"\r\n", " ");
    Exec        $raw_event = replace($raw_event,"\t", " ");
    Exec        to_json();
</Output>

<Route fluency>
    Path    eventlog, internal => fluency_out
</Route>

<Route DHCP_fluency>
    Path    dhcp_in => fluency_out
</Route>
Appendix B: TLS Support for NXLog sample
<Output fluency_out>
    Module om_ssl
    Host <companyname>.syslog.fluencysecurity.com
    Port 6514
    AllowUntrusted true
    CAFile %ROOT%\conf\ca.crt
    Exec $raw_event = replace($raw_event,"\r\n", " ");
    Exec $raw_event = replace($raw_event,"\t", " ");
    Exec to_json();
</Output>
Replace the "Output fluency_out" section in the default nxlog.conf file with the above text.
NOTE: An additional root certificate (ca.crt) will also be needed. This certificate file should be placed in the same directory as the nxlog.conf file on the target Windows server/machine. Please contact Fluency Support if you were not provided with this file.
Page last updated: 2023 Aug 07 16:37:10 EDT