Managing Users
Users List
Login to the Fluency Cloud portal: https://(companyname).cloud.fluencysecurity.com.
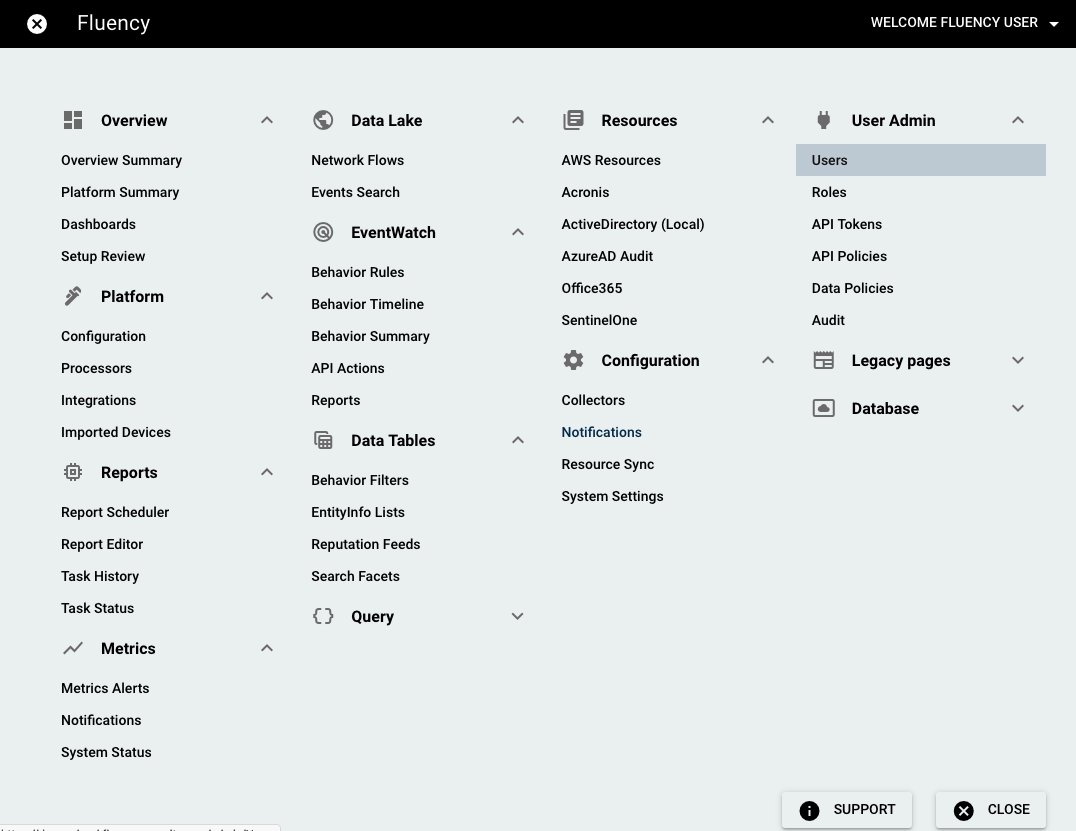
Open the Main Menu from the upper left-hand corner and choose the Users option under the User Admin section.
The Users page presents a list of the users who have access to Fluency. For each User entry, the current configuration are shown. To make changes to an account, select the "Edit" (pencil) button on the right-hand side of the row. A toggle for disabling a user is also present. Disabling a user allows you to restrict their access to the system without having to fully delete them, so their information is preserved.
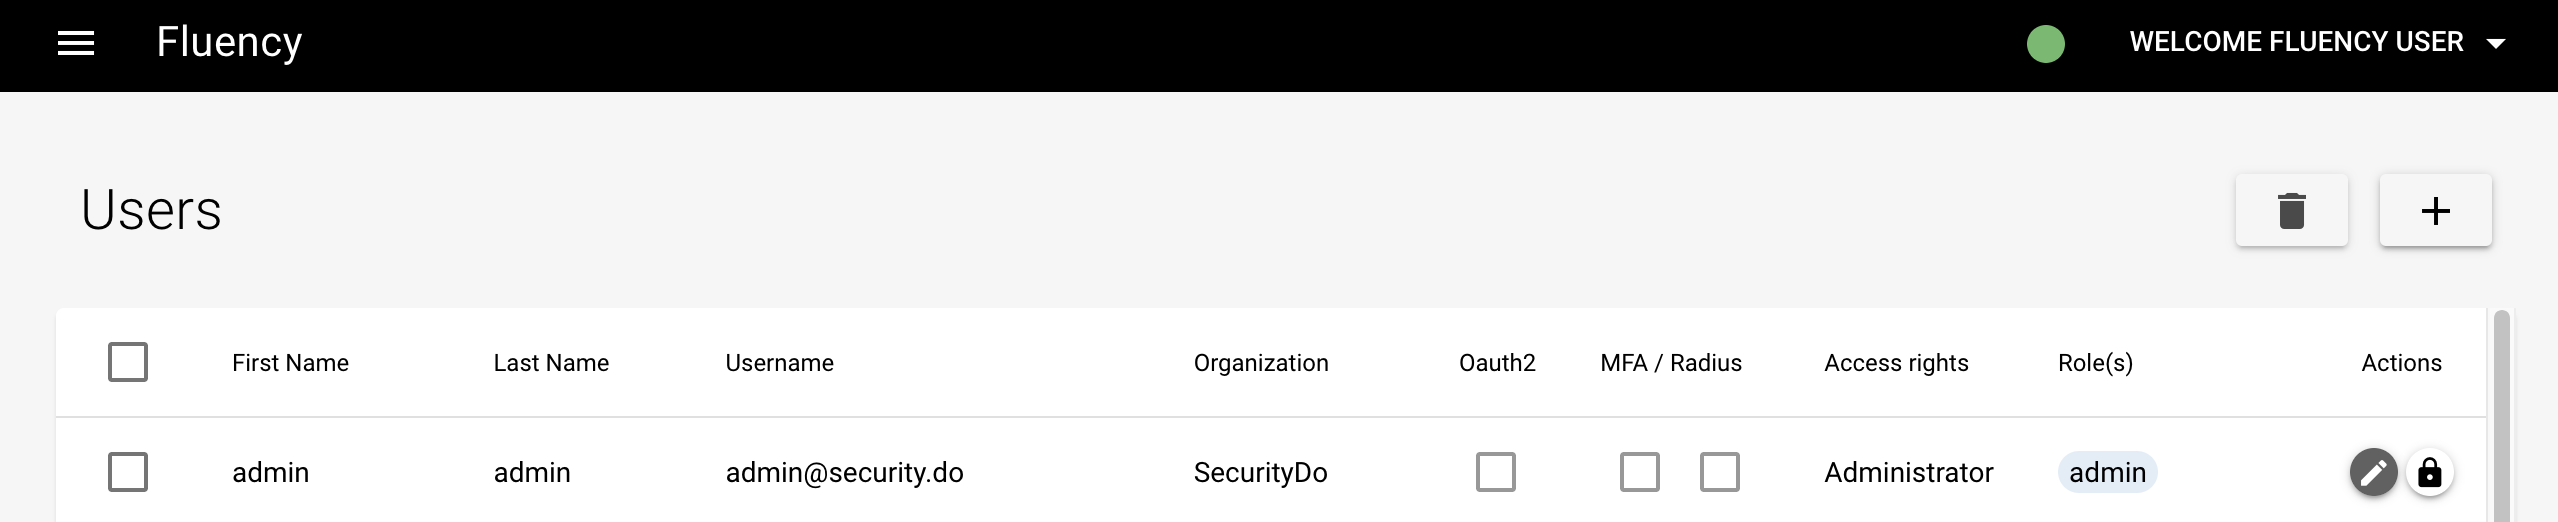
The upper right corner of the Users page has options to Add ("+") and Delete users.
Adding a User
To add a user, select the Add ("+") button to open the "Add user" window.
The following fields are required when creating a user:
- First name, Last name
- Username
- Company
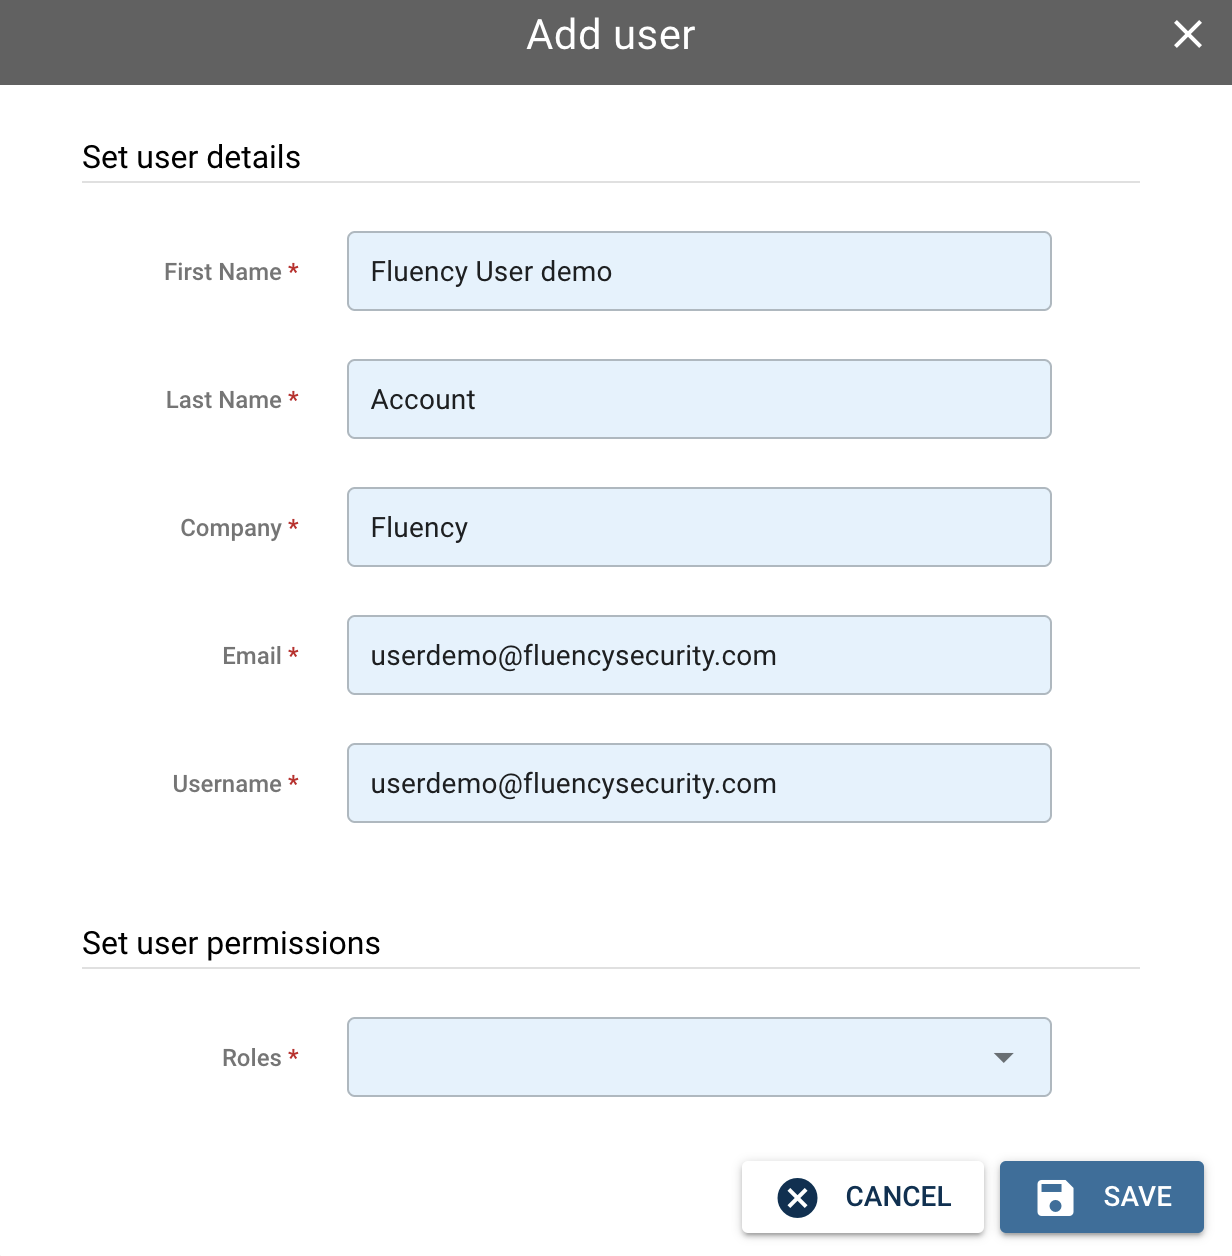
To begin, fill out the fields for the First name and Last name of the user. Next, add the user's Username and associated Email. Generally, the Username should be the user's Email. Then fill out the user's company Name.
Note: The username is case sensitive.
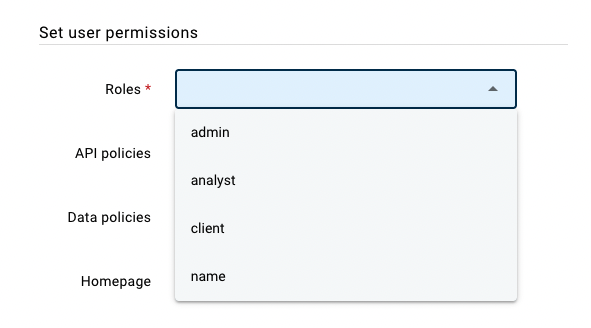
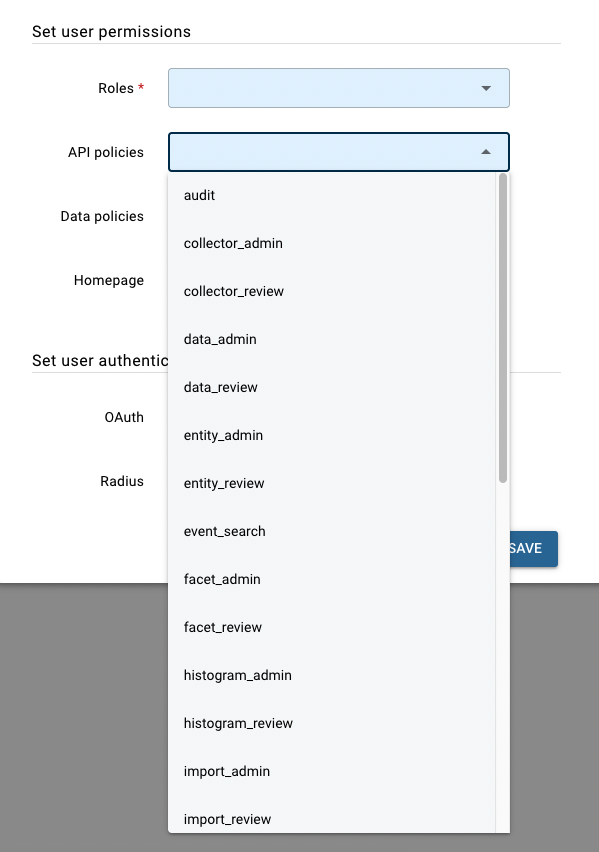
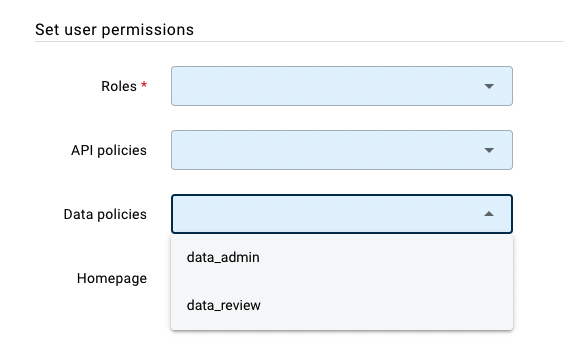
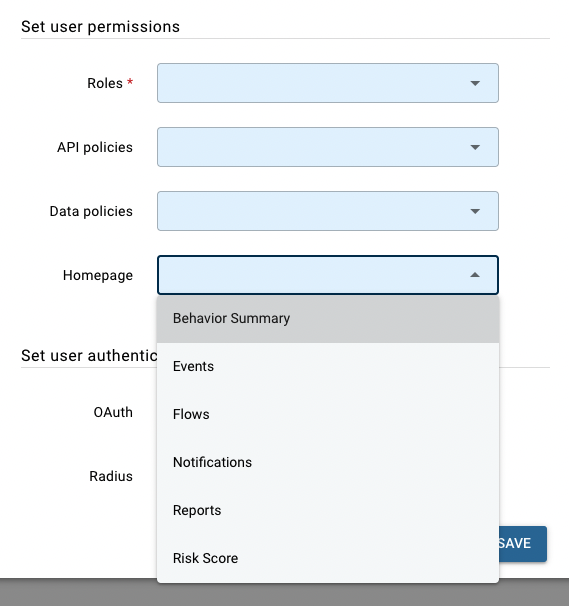
The next step is to set user permissions, including roles, API policies, data policies and homepage.
There are four options for "roles": administrator, analyst, client and name. An administrator will have access to all the pages within the Fluency system and be able to perform any configuration actions. An analyst, by default, will only be able to view data and analysis related pages.
Options for "API policies":
Options for "Data policies":
By default, when a user logs in they will be shown the Behavior Summary (Overview-> Overview Summary) page. However, another option can be selected so that upon login the user is able to view a page that is most useful to them and their usage of the interface.
The next step is to set user authentication. Select an Alternative Authentication method by clicking the "OAuth2" checkbox, if desired. If nothing is selected, the default is User/Password authentication.
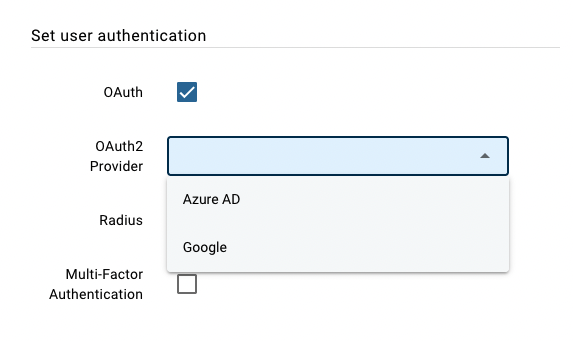
Fluency supports two OAuth2 providers: Azure AD and Google. If one of these options is selected, the user should select one of the Alternative methods from the login page to enter Fluency. This will redirect them to the provider's login page, allowing them to login through their provider's portal. When using User/Password authentication, Fluency can also integrate with RADIUS servers and supports Multi-Factor authentication.
Click the "Save" button to complete the user-adding process.
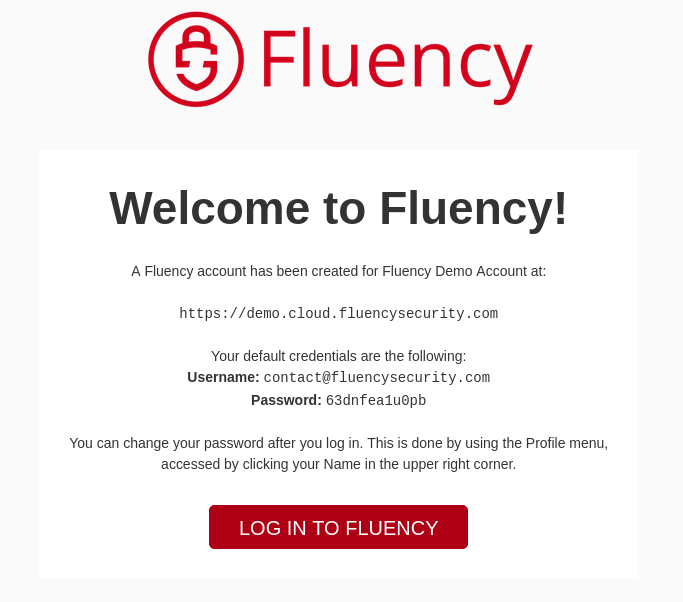
Welcome Email
An automated Welcome email will be sent out to the "Email" specified above from Fluency Admin to confirm the User addition. For accounts with the User/Password authentication method, this email will also contain the login Username, and a randomly generated Password.
Deleting a User
To delete a User (or multiple users), select the checkbox(s) on the left-hand side of the row.
At the upper right corner of the Users page is a Delete (bin icon) button. This button can only be clicked if any of the checkboxes to the left of the users are selected.
Warning: The Delete action removes a user (or users) from the system completely.
Page last updated: 2023 Aug 05 14:57:37 EDT